|
J Notes on the C-Pen 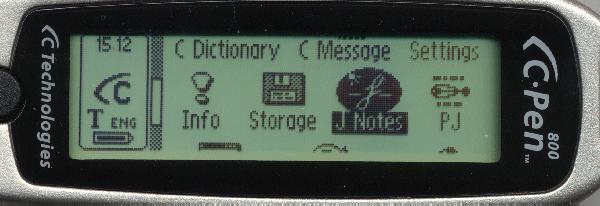
Start J Notes like any C-Pen application by selecting its application icon. 
The initial J Notes screen shows the name of the file being used to store text and images, in this case 020304.img located in the Storage folder. The filename is created from today's date (YYMMDD), in the example, March 4, 2002. The size of the file (214K) is also shown. Select Continue to add new images or OCR scans to this file, or to view the contents of the file on the LCD screen. Select Auto File to generate a new filename automatically. Move the selection to the text box to enter a new filename manually. There is a row of five buttons at the bottom of the screen. Use the Navigation button to select the type of input you wish to use. As you move the selection, the hint text will change. You do not have to press the Navigation button to select the capture mode.
Just moving the highlight to the IMG button will prepare the C-Pen for
image capture.
Capturing Images Capture an image by moving the C-Pen across the image in a straight line in the same way you would normally capture text. The software will compensate for slight aberrations in a straight line. Sometimes, it helps to move the pen along a ruler or a straight edge, but normally this is not necessary. For the best quality hand writing capture, it helps if the writing is on lined paper so the software can use the line to adjust for changes in the angle of the pen as it is dragged across the page and the pen will not be fooled by blank spaces between words. The captured graphic image will be displayed on the LCD screen. Due to the size and display capabilities of the LCD, the image you see will not be as clear as the image you will get on your PC after you beam the file across. A small amount at the bottom of the captured graphic will be trimmed from this view, and some gray parts will be visible on the PC which are not visible on the LCD. The LCD can only display black or white. The LCD display serves to indicate that you have obtained a complete scan of what you are attempting to capture. If you have deviated from a straight line, you might find that part of the image is missing. A pause in the motion, or a blank section in the image will cause the scan to terminate early. You will be able to see this on the LCD screen. The rest of the image can be captured in a second scan, or you can press the Escape button to try again. If you are not satisfied with what you have captured, press the Escape Button on the C-Pen. The image will not be saved. Take another swipe across the image and see if it works better the second time. As with all C-Pen captures, it cannot see red ink. The contrast of the captured image can be improved using the C-Pen Calibrate function found in the C-Pen Settings. In the upper left corner, there is an indicator of the size of the file after the
capture.
Capturing Text Capturing text with J Notes is exactly the same as capturing it with the Notes application you are already familiar with. Move the highlight to the OCR button and scan the text you want to capture. The scanned text will be displayed in the text box. If an error has occurred, press the Escape Button to immediately delete the text and try again. Note that only the first part of the captured text may be displayed. You can view the rest of the line by moving the selection to the text display box, selecting, and scrolling with the Navigation button. Editing Text and C-Write Move the selection to the edit box. Here, you can edit the text captured by OCR. The normal C-Pen edit functions all work, and you can use C-Write to enter new text or make changes. You can even cut and paste text from the edit box to a document in the C-Pen Notes application, Pocket History, or other programs that support text editing. If you are editing a scanned line, both the original scan and the edited
version will be saved to the file.
Time Stamp Sometimes it is convenient to indicate the time that you have scanned text
or an image. The Time button has been provided to make this very easy.
Move the highlight to the Time button and press the Navigate button
to select it. The date and time will be displayed on the screen and inserted
in the file.
Starting a New File
If the file to which you are saving images and text becomes large, or if you want to separate one set of data from another, it is possible to start a new file. Highlight the OCR or IMG button, and press the Navigate button to select it. A dialog box will pop up showing the name of the current file and its size. Select CONTINUE if you wish to continue to save captures to this file. Select AUTO FILE if you wish to start a new file. The new file will be named with the current date and a letter. There are 26 possible automatic filenames for each day. Move the selection to the text edit box to name the file using an OCR scan or using C-Write. J Notes filenames end in .img. This suffix will be added automatically if you leave a different ending on the filename. If you exit J Notes and run it again, you will also have the opportunity to begin a new file. Move the selection to EXIT and press the Navigate button twice. When the file becomes larger than 256K, the C-Pen will beep each time you
scan text or an image. This is a warning message to let you know that the file
is getting large.
|